Hey friends, here is the movie maker factory~~~
Well, through the IWB assignment, I’ve learnt a new skill in manipulating a new computer programme—Windows Movie Maker and I would like to share the process in producing a simple video/movie clip to all. Since this is also my baby steps in using the programme, I do wish those who are experienced in using it, would share their skills with me…
Undoubtedly, we can just download video clips from the internet and for sure, the visual aspect will be better than our self-made ones (as they would have such an expertise in producing those attractive flashes and video clips as compared to us, or I mean, me alone). Why do we need to take all the trouble to produce our own then? Well, through my experience in searching for a really suitable video clip that can be incorporated into our lesson through the use of Smartboard, I do find that it is not easy to do so. This is because the video clip that we are looking for should not only meet the lesson objectives; it should pitch at the pupils’ level and promote their learning at the same time. Hence, if you really want to enhance your lesson through video clip, but fail to look up for a suitable one in the net, I would suggest that you prepare your own. And this is the very reason for me to blog down the process in producing the video clip. I do hope with this little help, I would make your teaching life more interesting…
First and foremost, look up for all the images, pictures and even songs or music that can help in producing an interesting and suitable video clip. You can do so by surfing the net and download them into your picture gallery or you can scanned from other sources and save them in a folder in you computer/notebook.
Firstly, open up your Windows Movie Maker programme and
import those images or pictures or songs/music
that you want to have in your video clip.
You may even capture images to the Windows Movie Maker.
You can find those icons for importing images/music on
the
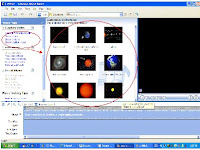 Diagram 1
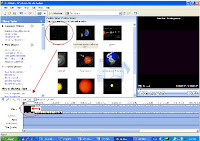
Diagram 2
For the music or songs, do the same as the above as well.
It will appear in the 'Audio/music' column.
You may also, same as the graphics, drag the music length
to the intended playing time-frame you wish.
~ As shown in Diagram 3 ~
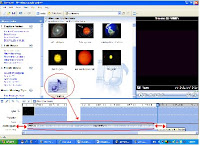
Diagram 3
Now you can play the images and songs. However, you can enhance your video clip by adding some effects to it. Just go to the second part on your left and you would find icons for adding video effects.
Click on it and you can play and choose any of the effects. Then
drag them into the pictures or images that you want.
~ As shown in Diagram 4 ~
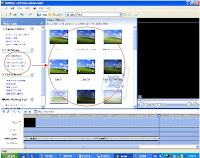
Diagram 4
You can add different styles of video transitions too!
Just click on the icon for video transitions and choose one of your favourite styles.
Then drag and place the video transition style
in between two images or pictures.
~ As shown in Diagram 5 ~
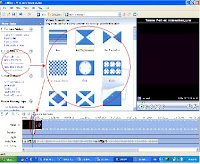
Diagram 5
Also, you may add title to your video clip.
Just click on "Make titles or credits" on your left hand side and you will
be prompt to choose on where you would like to place the title.
Just click on the selected option and a blank column will appear.
Type in your intended text/wordings.
Then below the column, there are options for you to change
the title animation, as well as the text font and colour.
Just click on the option and choose your intended style.
~ Diagram 6 below shows a rough scence on the process I've described ~
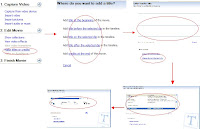
Diagram 6
Just go to the 3rd column under the option "Finish Movie" on your left
and choose a save mode for your product.
A save wizad will appear (as shown in Diagram 7 below)
and you will be prompt for a simple saving process.
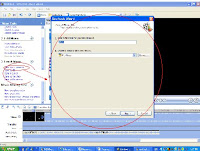
Diagram 7
You can also try playing the movie by using the smaller version of Windows Media Player
that is situated on your right hand side.
You can have full screen view on it as well.
Still don't quite get it? No worries!
There is an option for movie making tips on your left.
Just click into the areas that you would like to learn more
and I'm sure there will be not a single problem in producing
your own video clip by using this programme!
~ Please refer to the Diagram 8 below ~

Diagram 8
Well, if you save your product in such a way as mentioned above,
you may still edit it.
However, if you have finalized your product,
then go the the option on "file", which is situated at
the uppermost left hand corner of the page and click on
"save project"/"save project as...". When this is done,
there is no room for any edition and the video clip is the
final piece of work that you may upload
to any other intended programme you wish
(e.g. into the Smartnotebook programme).
Well...the process of producing a simple vide clip by using the Windows Movie Maker is just as simple as this... The matter is, do we have the time and the urge to produce it? Trust me, try to produce one, the feeling of success worth more than everything you've spent in producing it. It may not be perfect, but at least, it caters to your pupils' needs since you are the one who have produced it, since you are the one who understand your pupils most.
Also, I would like to take this opportunity to thank Aizam for her brief tutorial in guiding me to complete my first virgin cideo clip... Thanks Aizam!!!
Happy Learning and exploring to all...
~ A Product by Sze Mei ~